Visual solving · An interactive read
The X-Wing: four corners, one clear deduction
Learn to recognise a Sudoku X-Wing, see why its two possible arrangements force eliminations, and test the idea in an interactive candidate map.
The idea to take away
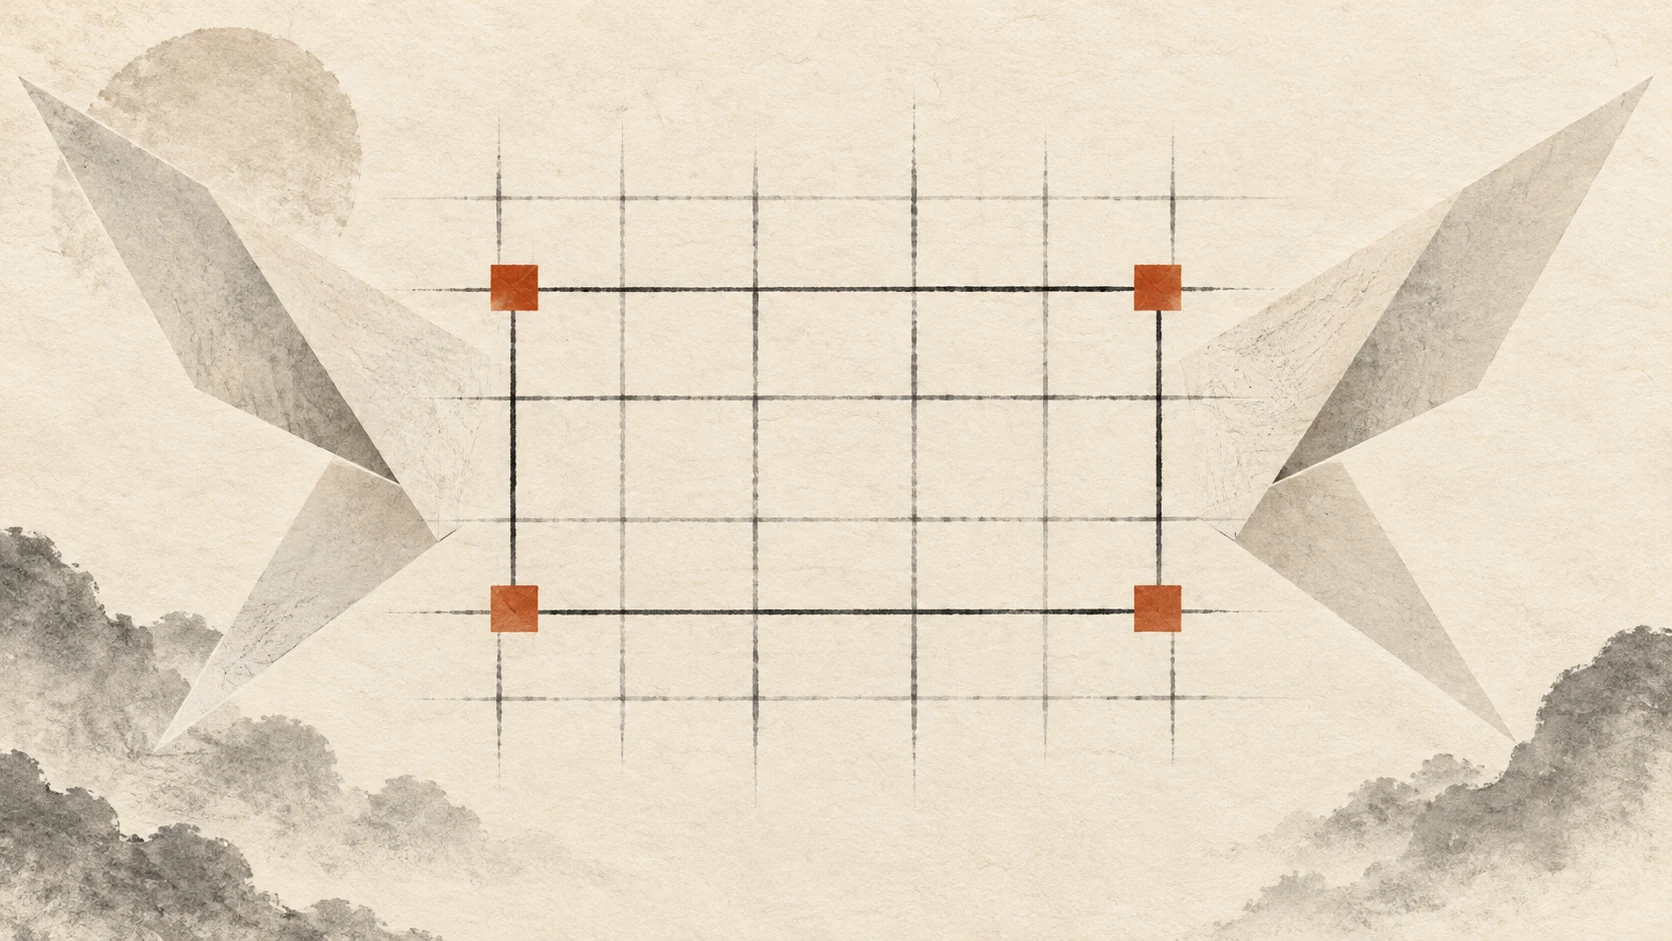
When a digit has exactly two candidate positions in each of two rows, and those positions share two columns, that digit can be removed from the other cells in those columns.
Let one digit come into focus
A busy Sudoku can hide a surprisingly simple structure. Instead of scanning every pencil mark at once, choose a single digit and follow its remaining positions across the board. In this lesson, that digit is 5.
An X-Wing connects two rows through two columns. It is an elimination technique: it tells you where a candidate cannot go, even when you cannot yet place either of the two numbers that create the pattern. Andrew Stuart’s guide explains the row-based pattern and its column-based counterpart. [3]
Before looking for it, make sure your candidate notes are complete. A forgotten pencil mark can make an ordinary row look restricted when it is not. If notes are still new, start with our candidate-note guide.
Find the rectangle—and check its rows
For a row-based X-Wing, look for a digit with exactly two candidate cells in one row. Find another row with exactly two positions for the same digit, in the same two columns. The four intersections make a rectangle. The restriction in the two selected rows is the reason the pattern works; the rectangle’s appearance alone is not enough. [1]
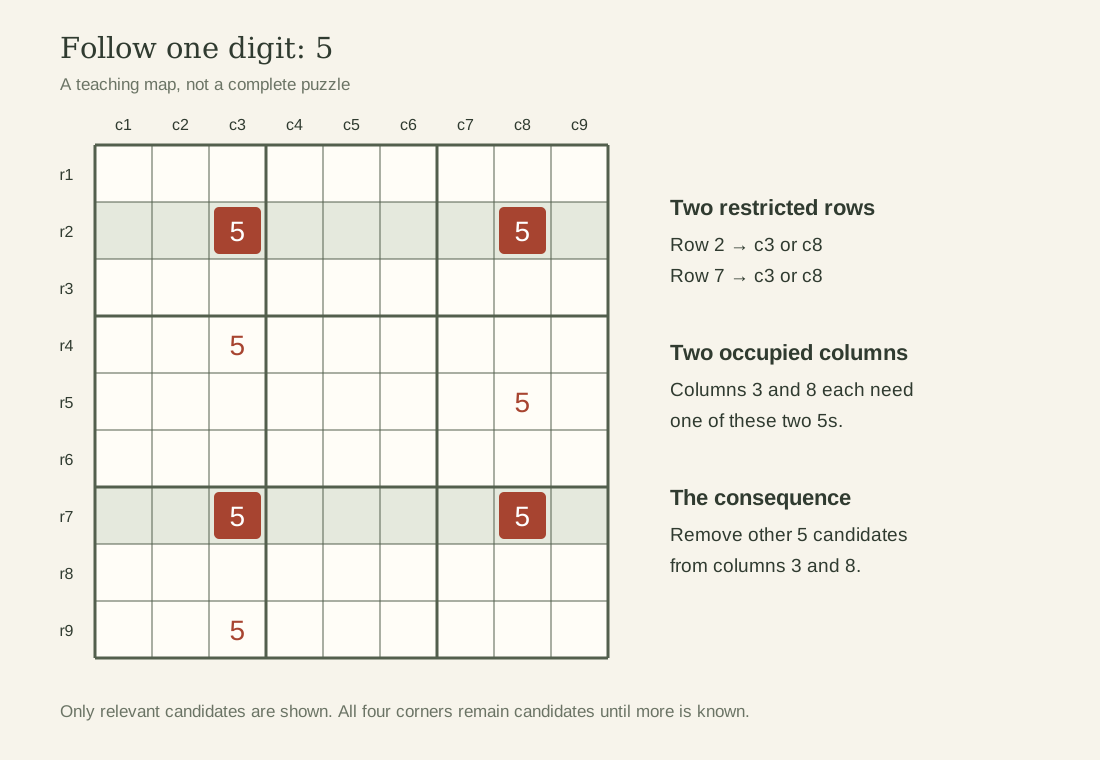
Here, the selected rows are 2 and 7. Their candidates line up in columns 3 and 8. Read r2c3 as “row 2, column 3,” counting from the top left. Other digits may still be candidates in these four cells; this pattern makes no claim about them.
Two possibilities, the same consequence
Start with the upper-left corner. Suppose row 2’s 5 goes in column 3. Row 7 then cannot use column 3, so its 5 must go in column 8. Now try the other possibility: row 2 uses column 8, which forces row 7 to use column 3.
Those two diagonal arrangements exhaust the choices available to these rows. In both arrangements, columns 3 and 8 each get their 5 from one of the selected rows. Therefore, neither column can contain a 5 in any other row.
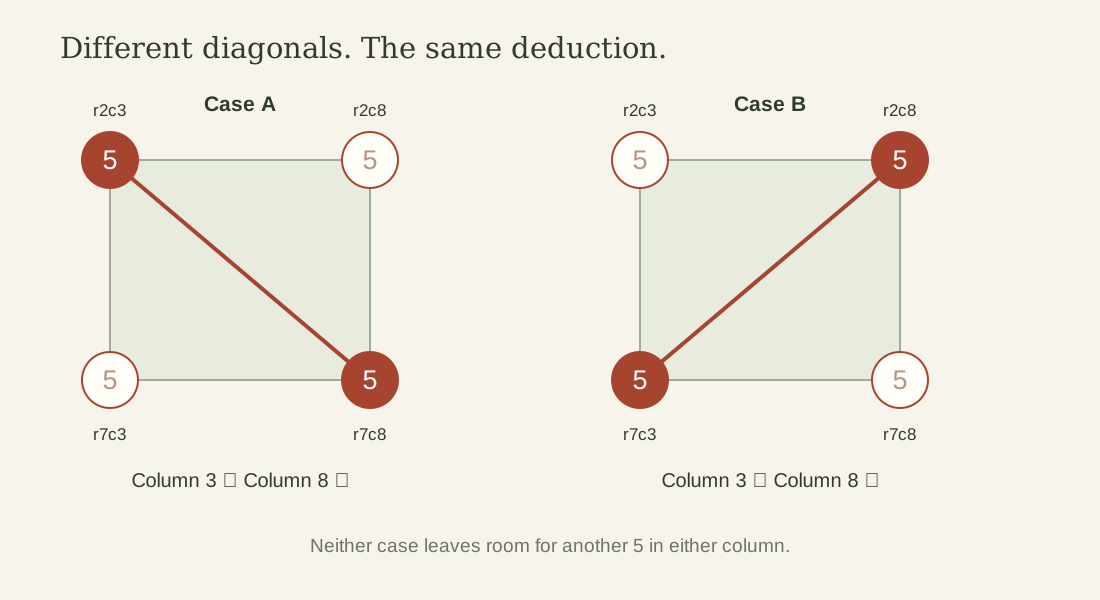
This is a proof by considering all possibilities, not a guess entered into the puzzle. You can leave all four corner candidates in your notes and still make the eliminations outside the rectangle.
Try the deduction yourself
Switch between the two cases below, then reveal the eliminations. Watch the columns rather than just the highlighted corners. Can you explain why the candidate at r4c3 disappears in either case?
The exercise deliberately leaves out unrelated candidates. It is a small model of the argument, not a Sudoku to finish. On a real board, first confirm that the two selected rows really have no other positions for 5.
After the elimination, stop and rescan. A cell may now have a single remaining candidate, or one of its units may have only one place for a digit. The value of a larger pattern often appears in the simpler deductions it unlocks next.
Three ways a lookalike can mislead you
- An extra candidate in a selected row. A 5 elsewhere in row 2 or row 7 breaks this basic argument. You would have more than the two cases shown here.
- The wrong elimination direction. With restricted rows, look for eliminations in the crossing columns. Turn the entire argument around for a column-based X-Wing.
- Placing all four corners. Four candidate positions do not mean four solved 5s. Each selected row still needs just one.
HoDoKu’s broader fish explanation describes the general relationship between the selected units and the units they cover. Larger patterns and finned patterns need additional conditions; a near-rectangle should not be treated as a valid basic X-Wing. [2]
There is one more practical check: a valid X-Wing can have no elimination targets left. In that case, recognising it changes nothing yet. Do not force a placement or delete a corner simply because you have found the shape.
A small routine for your next solve
Try one deliberate pass rather than hunting indefinitely. Choose a digit, note the rows that have exactly two candidates for it, and compare their column positions. If a pair aligns, check both rows again before removing anything. Then rotate your attention: compare columns with two candidates and look for matching rows.
Use the name only as a reminder of the structure. The useful skill is being able to explain what the two constrained units force, and which other cells must give way. If you cannot give that explanation yet, revisit the two-case diagram and follow one diagonal at a time.
Finally, keep difficulty labels in perspective. Recognising this pattern is one part of a solving toolkit. A careful pass for singles can still be the best next move, even after you have learned more advanced techniques.
Go to the evidence
Sources & further reading
Research checked on 14 October 2026. Follow the original sources to explore the evidence and its limits.
- Bernhard Hobiger — HoDoKu: Basic Fish
Primary technique documentation explaining the X-Wing’s row/column restrictions and eliminations. Our coordinates and teaching diagrams are original.
- Bernhard Hobiger — HoDoKu: Fish (General)
The general framework for fish patterns, their base and cover units, and the distinction between basic and finned forms.
- Andrew Stuart — SudokuWiki: X-Wing Strategy
An independent solver author’s explanation of the row-based and column-based X-Wing. No puzzle from this source is reproduced.
Keep exploring